The Good Old Days Of Photography

Olden Days Of Photography
Not Really New
The new age of photography isn’t really new anymore. In fact, it’s been here for a while. You’d know that if you were a baby boomer like me. If you’re not, you probably don’t know what taking and developing pictures was like in the “olden days”.
And I do mean “olden days”. My first acquaintance with any type of photography was when I was about 5 years old and I saw some antique glass negatives and “tin type” pictures at my grandmother's house. At the time I didn't know what they were.
It seems my great grandmother was one of the first amateur photographers in Crawford County, Arkansas. She started during the late 1880s'. Grandma told me about how her mother would take photographs for her neighbors in the Boston Mountains, the foothills of the Ozarks. She did everything from taking the portraits to developing the prints in her own make shift darkroom.
People Still Love Photos

Photography Was A Novelty
In those days photography was still a novelty. But people then, as today, loved to see photos of themselves, so my great grandmother was a very popular lady. She was born in 1865 and passed away in 1957. I have a few of her glass negatives.
However, although I learned to develop and print pictures in the early 1970’s, I have no idea of how to make a print off one of those large glass monstrosities. Therefore, I don’t know who is pictured on them either. But I heard it can be done.
So, I learned to be a photojournalist while in the Marines in 1974. When I joined up I had no clue that would be my profession. Near the end of boot camp the soon to be full-fledged Marines are informed what their military occupational specialty (MOS) will be. They are chosen for select fields according to scores they made on a battery of tests.
You Need A Good Camera
I Became A Photojournalist
My vocabulary score indicated I might be suited for work in broadcasting or journalism, so I was interviewed by the base public affairs office. They agreed and I was sent to Ft. Benjamin Harrison, Indianapolis, to attend the Joint Military School of Broadcasting and Journalism. I didn’t have a voice for broadcasting, but had the skills to become a good journalist. Photojournalist, I should say, since photography was part of the course. It also involved processing your own film.
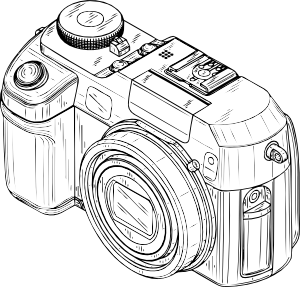
Taking photos, developing film and making prints, is done much differently today. Most people now use digital cameras. I don’t even know if you can buy a regular old fashioned single lens reflex (SLR) camera anymore. But with them you had to manually focus, get a light reading, set ISO, shutter speed and aperture opening to get a good photo. I’ve heard many say they prefer the older cameras and this ritual. There’s no challenge with the new stuff.
Today getting prints are relatively easy. Point your digital camera, take the shot and you can instantly view it on the little TV screen built in. No negatives needed…only a little memory card. No darkroom with all its’ paraphernalia. All that’s required is a computer, simple printer and photo paper. No fuss, no muss.

I Miss The Challenge
But, I miss the challenge also. Photography is an entirely different world with film processing printing and using a darkroom. Black and white film isn’t as difficult as color, but it can still test your abilities.
First, get an old fashioned type can opener, the kind used in taking off bottle caps and putting those “V” shaped holes in the top of cans. This will be used in opening the film casing. Make sure you’re in the darkroom first. Believe it or not I’ve seen people do it in an illuminated room.
Inside the darkroom you should have a luminous timer, a special spool, developing chemical, stop developing chemical, developing canister and running water. That’s if I remember correctly.
Remember, you are in complete darkness and everything has to be done by touch. Open the film case and remove the film. Take the spool and find the clip which will fasten one end of the film to it. Once clipped on the film must be carefully rolled onto the spool with no folds or creases. This takes practice.
Next take the canister which should already be filled with developer. Place the spool inside and put the cover on. I don’t remember exactly how long the developing takes…buts it’s only a few minutes. Your timer will let you know when to empty the chemical and fill with the stop developer. Hey! This was many moons ago and I don’t remember so good! Now, unwind the film and hang it up to dry with a light weight at the bottom to keep it from curling. There’s also a special dryer which can be used.
So, now it’s dry. What’s next? It’s got to be printed. This is also done in a darkroom, but now special low level lighting can be used. An enlarger is needed which is simply a big, bright light machine. There are special carriers used to put a strip of negatives in which is inserted into the enlarger. The light shines through a selected negative and projects the image onto photo paper. Usually, experimenting with exposure times must be done to get correct settings. Easy, huh? Not so fast! The image was projected onto the paper, but there’s still no image.
Here comes the fun part. A series of rectangular pans are now needed. In these pans and in this order will be: developer, stop bath, fixer and one with water. Hope I got all of them. The pan with water must be supplied with clear running water to rinse off all the other chemicals. Now, look at your fingers. See how yellow they are? This stain doesn’t wash off overnight! Gloves, you say? OK, but pick up all the stuff that slips out of your hands…and they will.
This process is done by sight and takes practice determining how long the paper stays in the developer while swishing it around. Things look much different under the special low level lighting than in a normally lit room, so it may take several tries before getting it right. When it seems the print looks right, it’s quickly plopped into the stop bath to kill the developing action or it will end up a solid black.
The next step would be the fixer bath. The photo must sit in that a while. It will keep it from turning yellow in the future. No, it won’t work on getting the yellowish stain off fingers.
Now it’s time for the finishing touches. The photos are moved to a rinse pan where they need to stay a long time. If I remember correctly, about 45 minutes to an hour. Then they must be hung up to dry, just like the negatives were done. Or, use a photo print dryer. It has a large heated cylindrical drum that turns around a wide canvas type belt. The photos are placed face up on the belt which carries them to the heated cylinder and presses them up against the drum. The drum makes a complete rotation at which time the dried photos are dropped off into a basket. This takes 15 to 20 minutes.
Doesn’t this seem like much more fun than today’s’ modern way of doing it? And if I got any of this wrong I’m sure you’ll let me know.

 Old Days in Yonkers Weren't So Bad After All")
")
 Size Film Negatives on a Canoscan 8800f Scanner -Made Easy")


